I thought initially I would just dabble in miniature straw hat making but turns out, I am not capable of dabbling. My dabble turned into an entire research project on the subject with Teresa Wetzel becoming my go to person on the subject. Teresa was not into dollhouse scale hats but her knowledge of hat making has been invaluable. As with most of my dabbling, aka research, I now own a library of books on Millinery, have basic knowledge of the many different types of hat braid, best places to buy it and, with that, now own many yards of hat braid both vintage and new.
Here are a few of my notes:
Dollhouse scale straw hats can either be hand stitched or glued. Gluing is by far the quickest. Grrrip glue is our glue of choice and is available again on our web site.
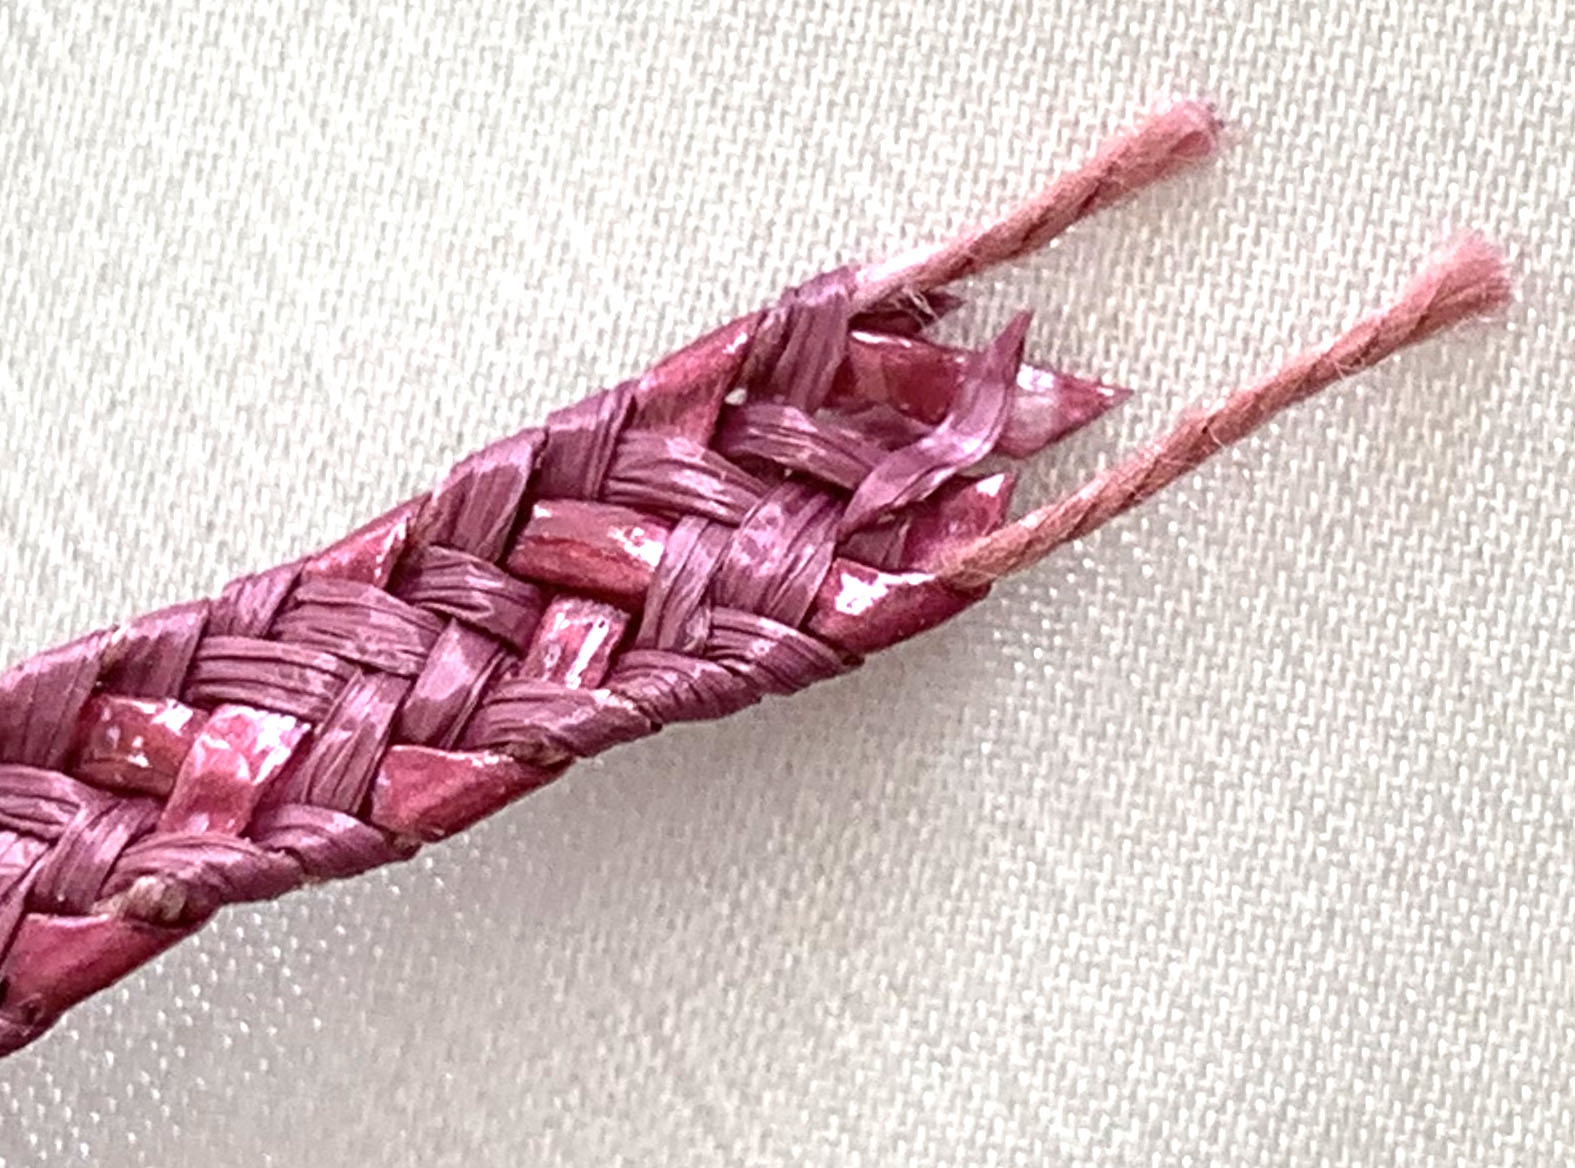
Braid Info & Samples
Any natural fiber braid, i.e., raffia, paper, cotton & hemp can be used. Most braids will be mixed with some combination of synthetic fibers so keep in mind pliability is the key. 100% polypropylene fiber, aka Plastic, is not suggested for use. It is not as pliable as natural fiber combinations and the glue takes longer to set up. 3/16”-1/4” wide braid is ideal for miniature use.
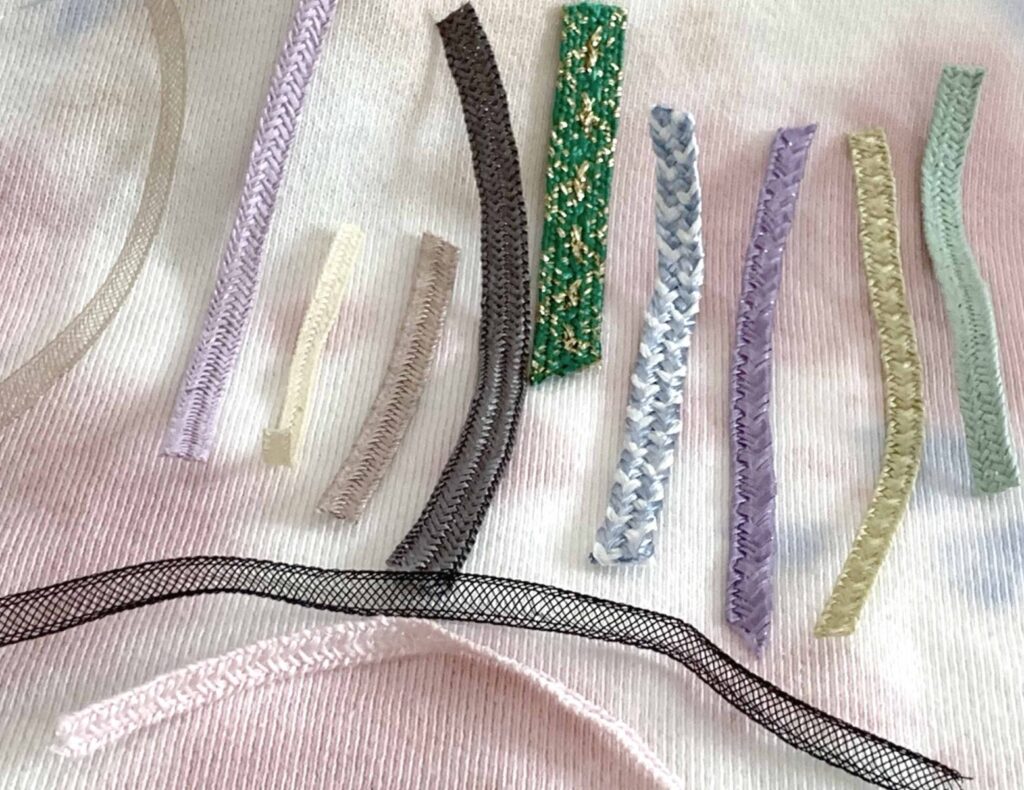
Prior to beginning a project, any braid used should have sizing removed by running a fingernail along the underside. The more pliable, the easier to manipulate. Also, many of the threads running through the fiber will snap during this process adding flexibility.
Shaping Your Hat
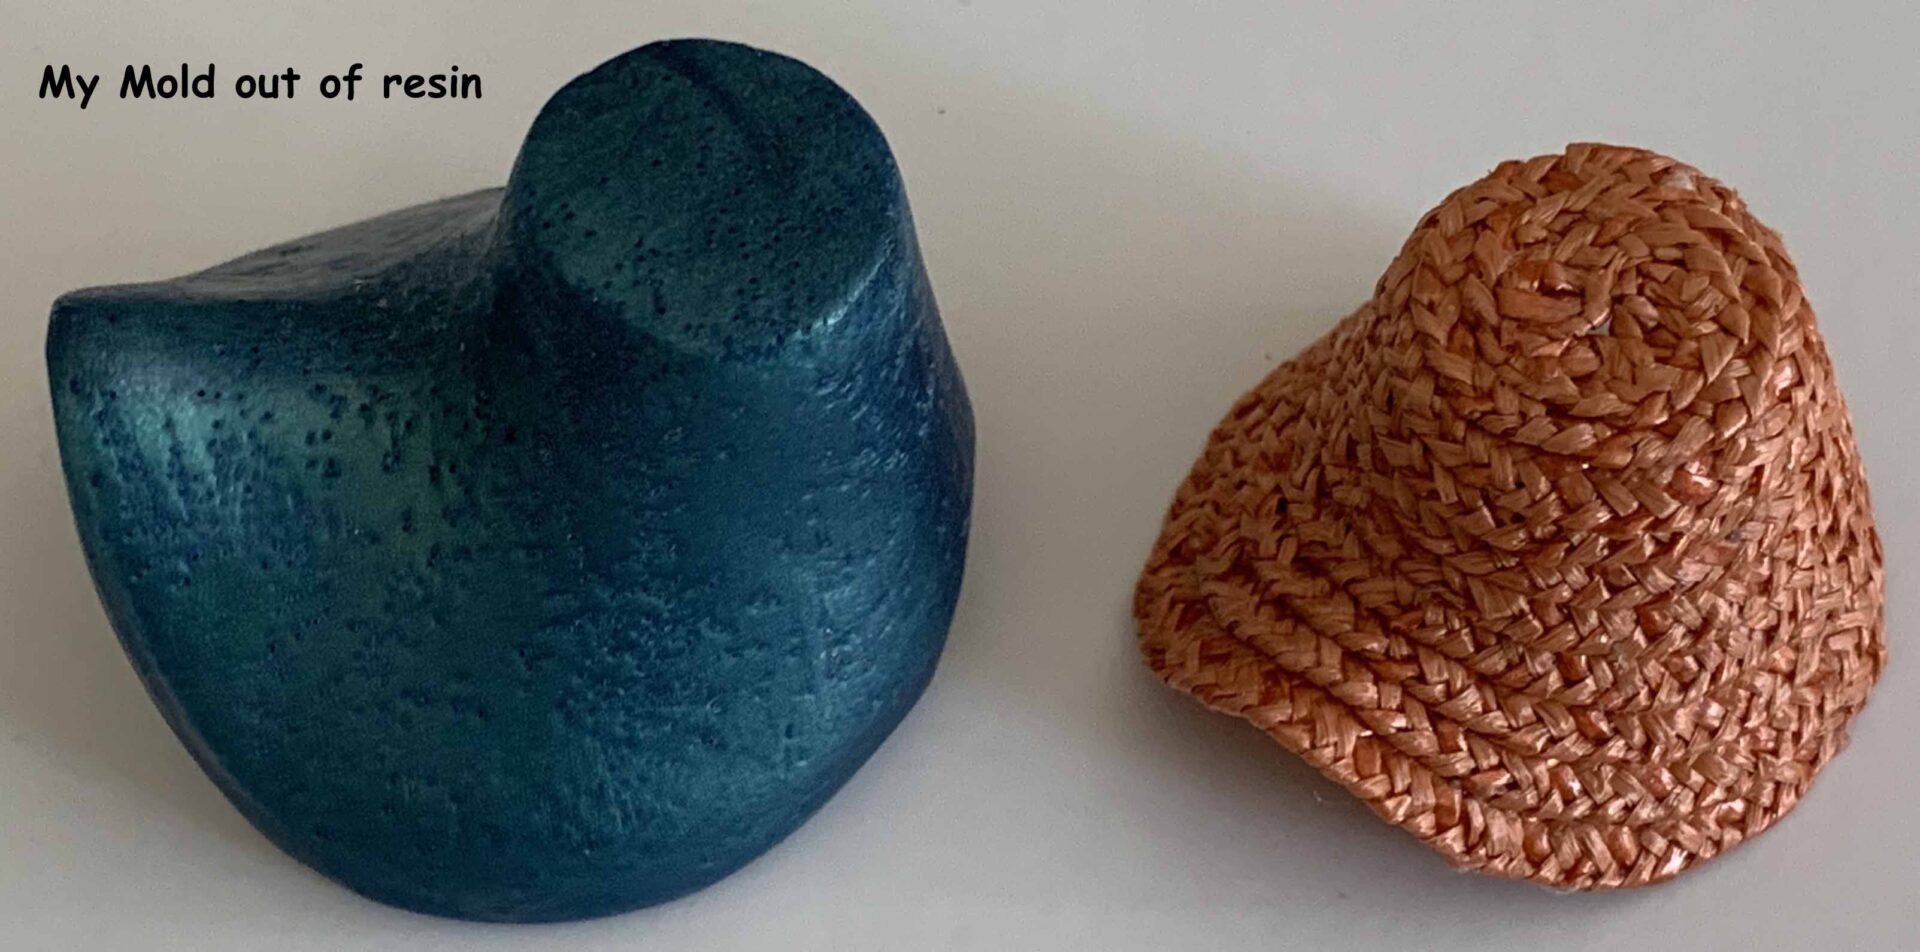
We use a hat form to shape our hats. Some doll size forms are available on line or you can make your own using a variety of materials. Unless you are really serious about hats, it is probably best to just buy a form or two. Forms are available in our Etsy Store. If you don’t find what you are looking for, let us know.
As we experimented, we found that starting the braid from the outside edge of the brim and working our way to the crown allowed us to conceal all braid raw edges.

Working from the crown down might seem the most intuitive but the braid tail will always be visible on the brim edge when finished.
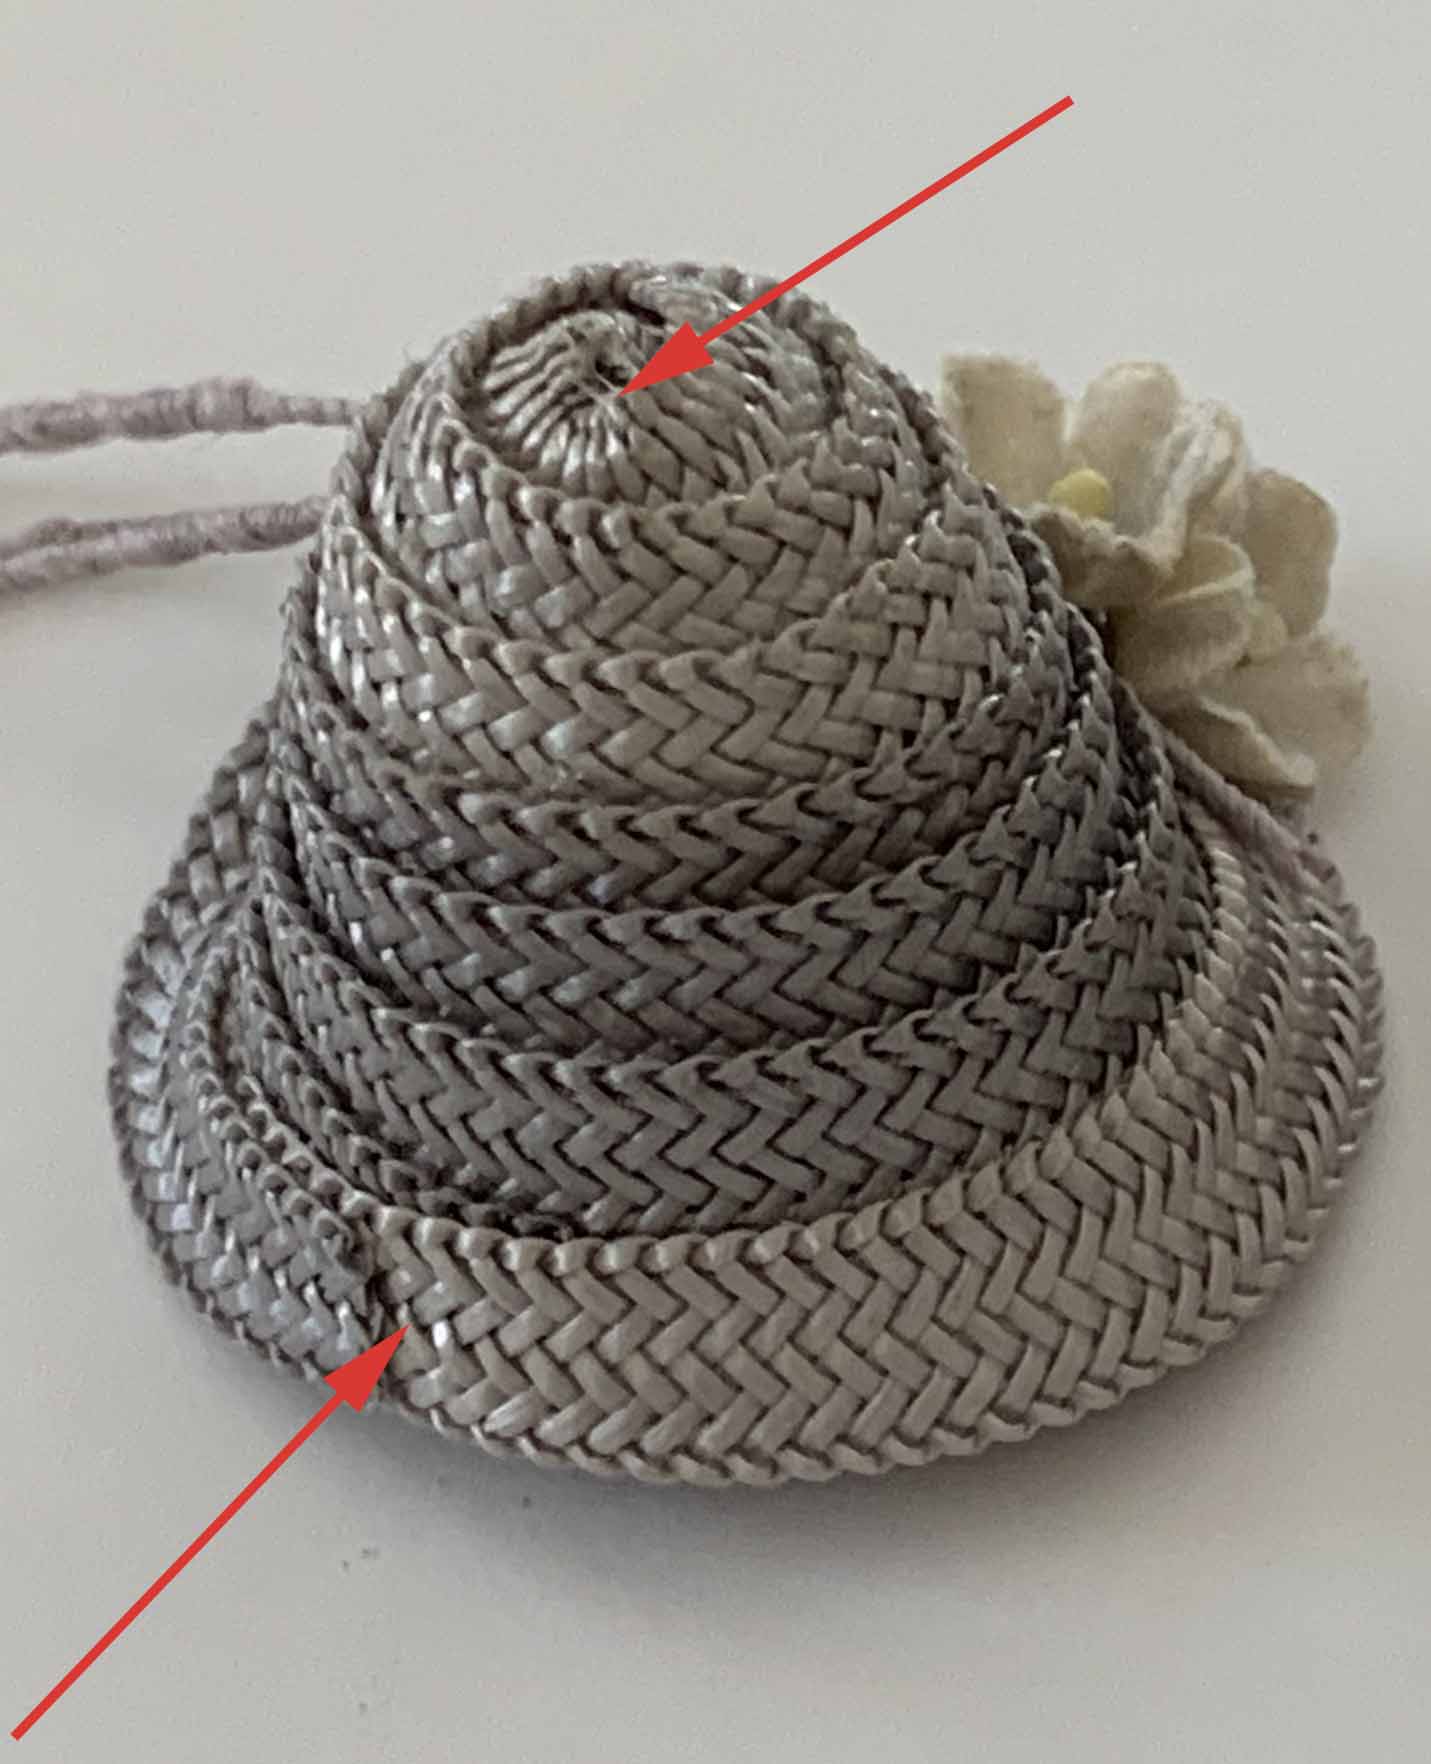
Braid worked from the crown down. Note how each row of braid is on top of the last row. Also, braid tail is visible.
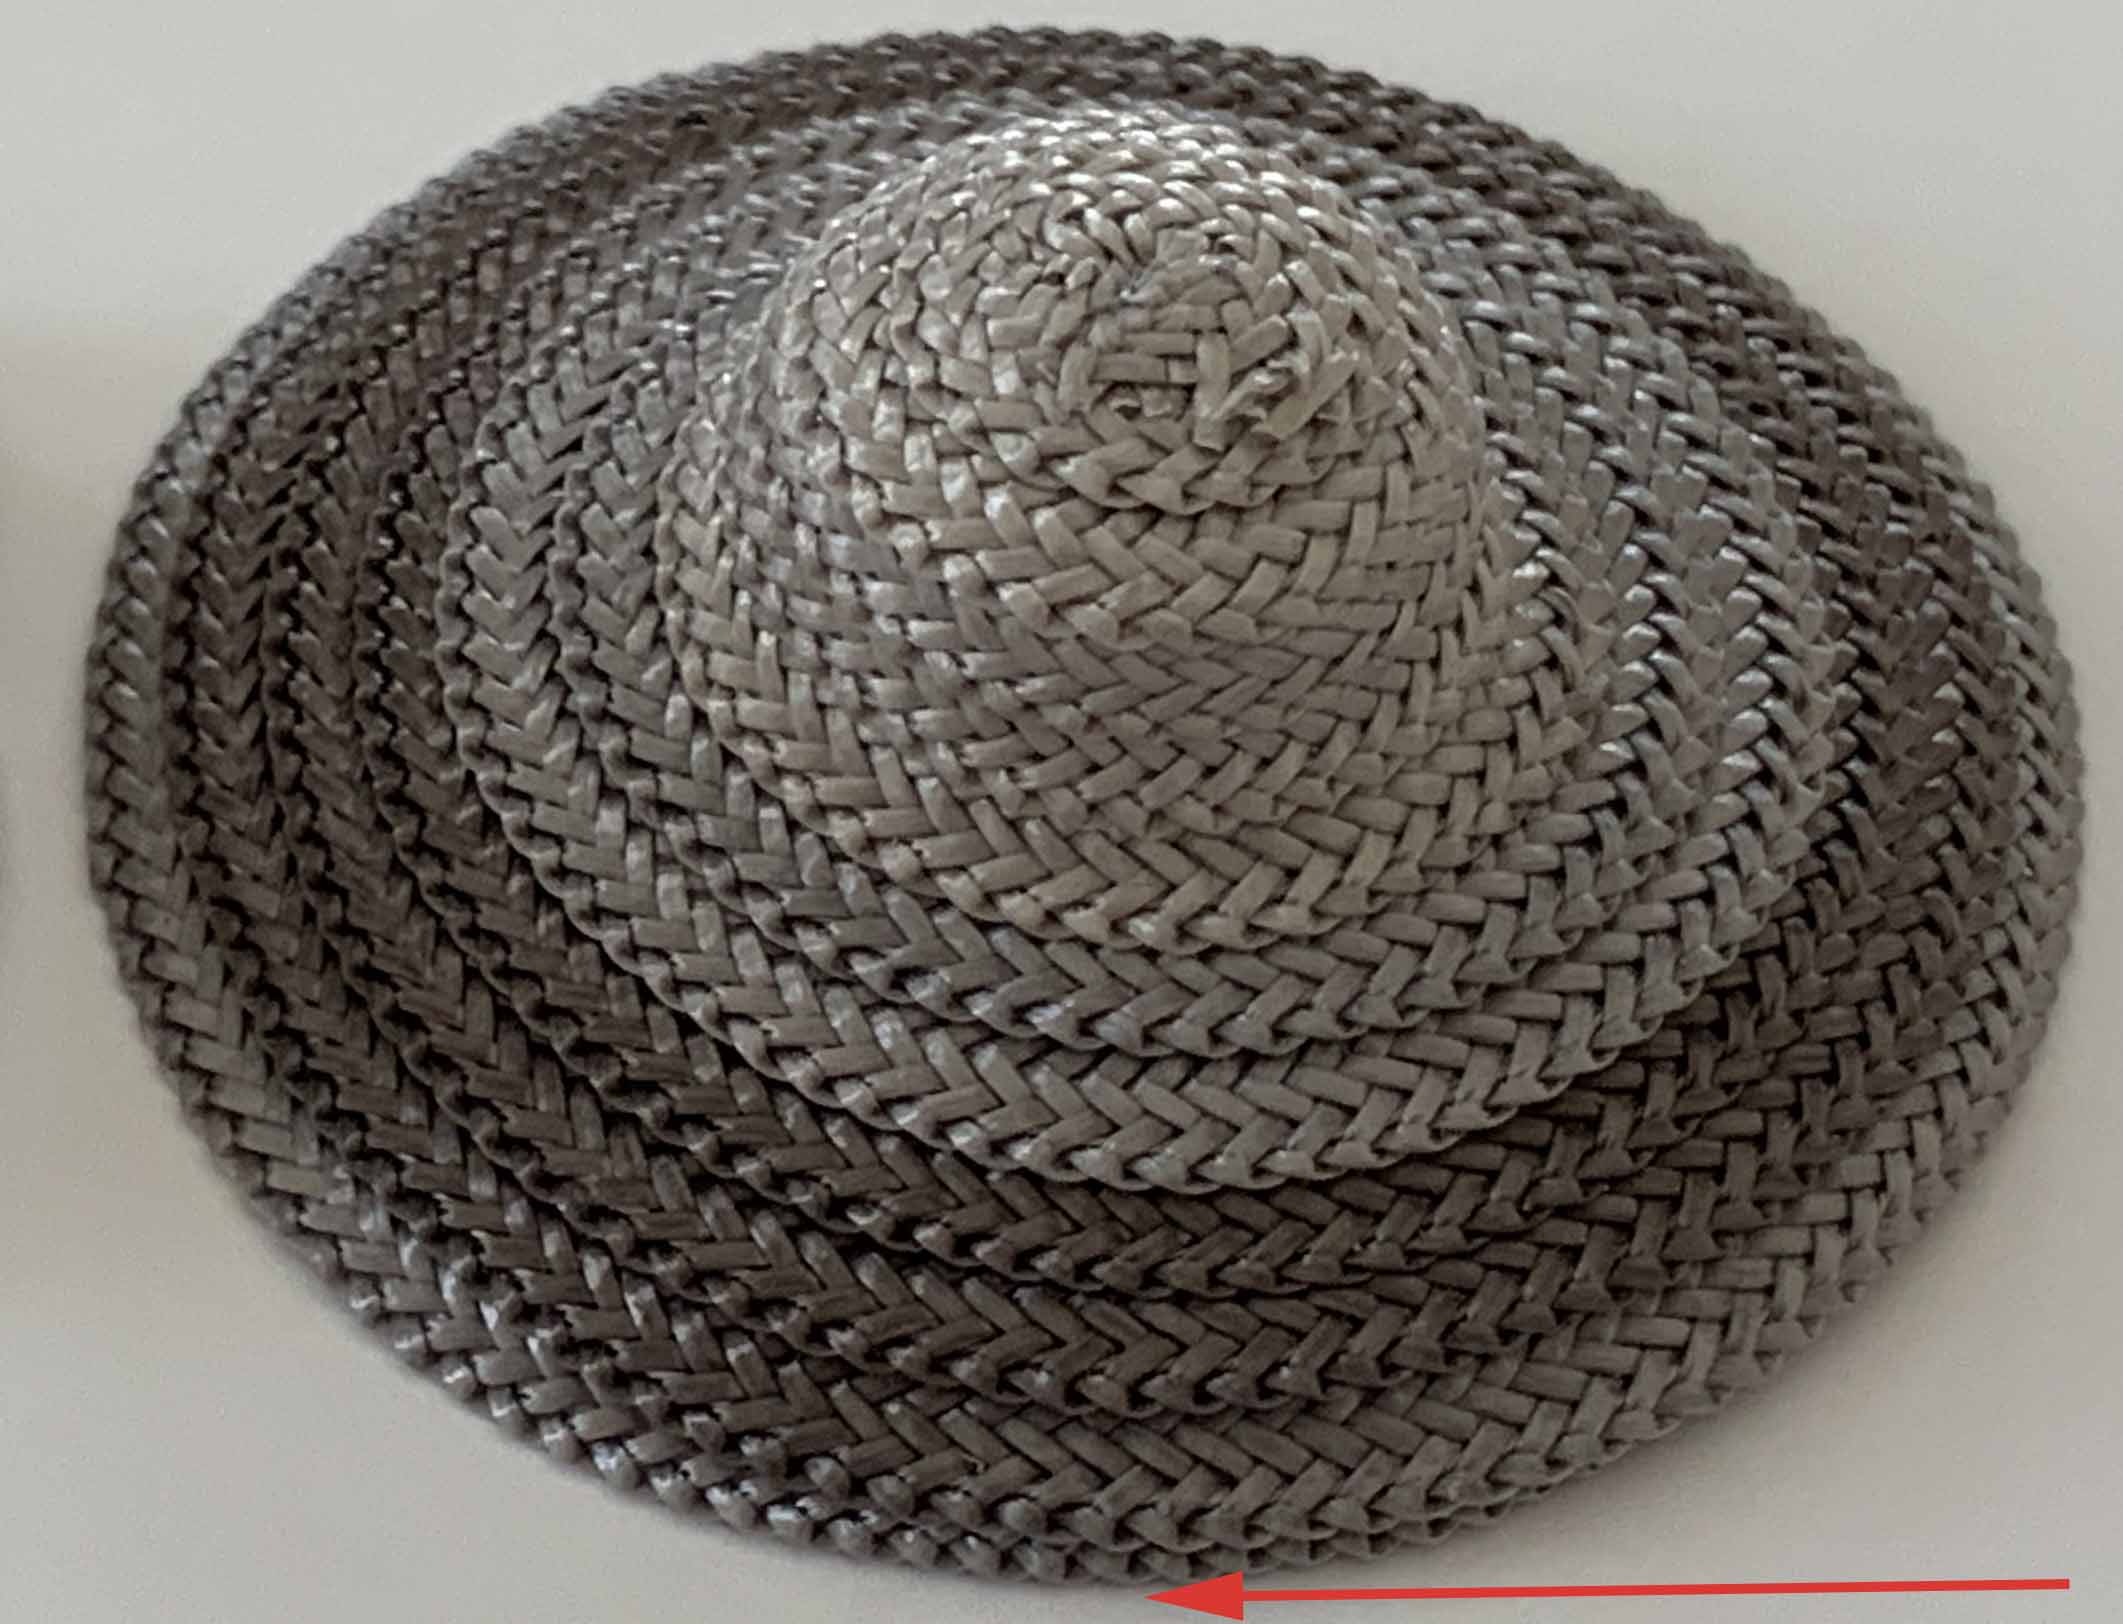
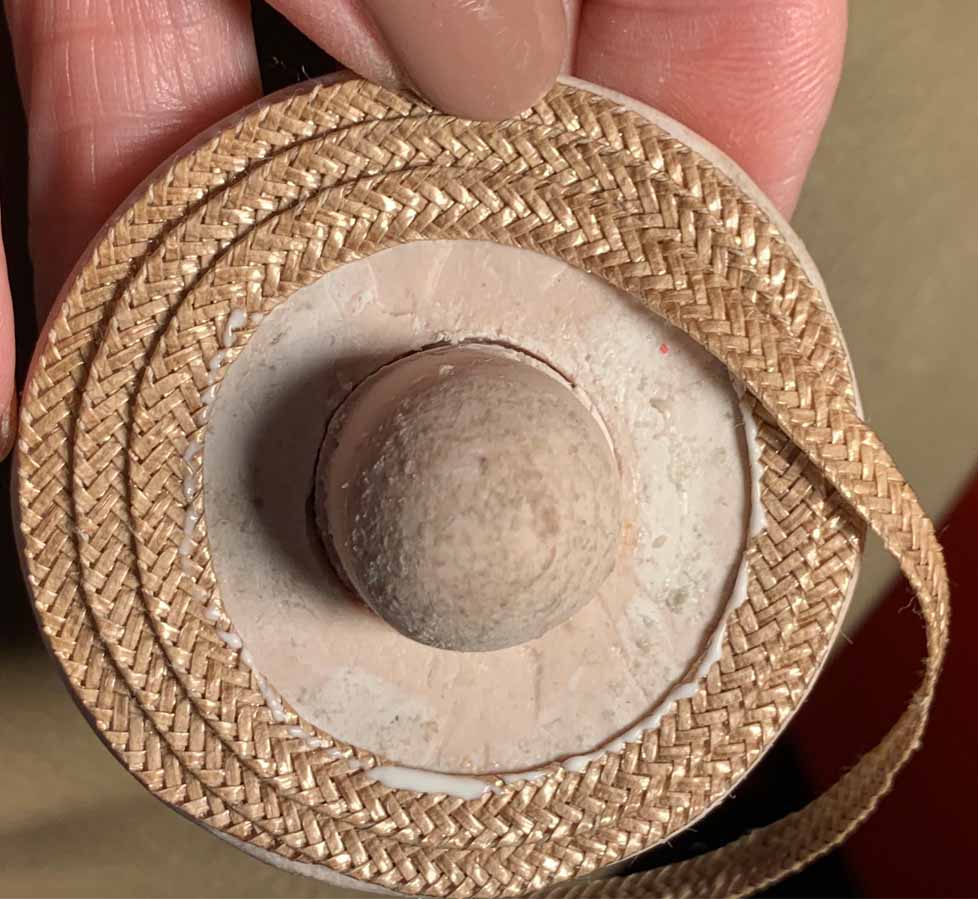
Braid started at outer edge of brim and worked up to crown. Braid tail concealed and smoother look when next row is on top of last.
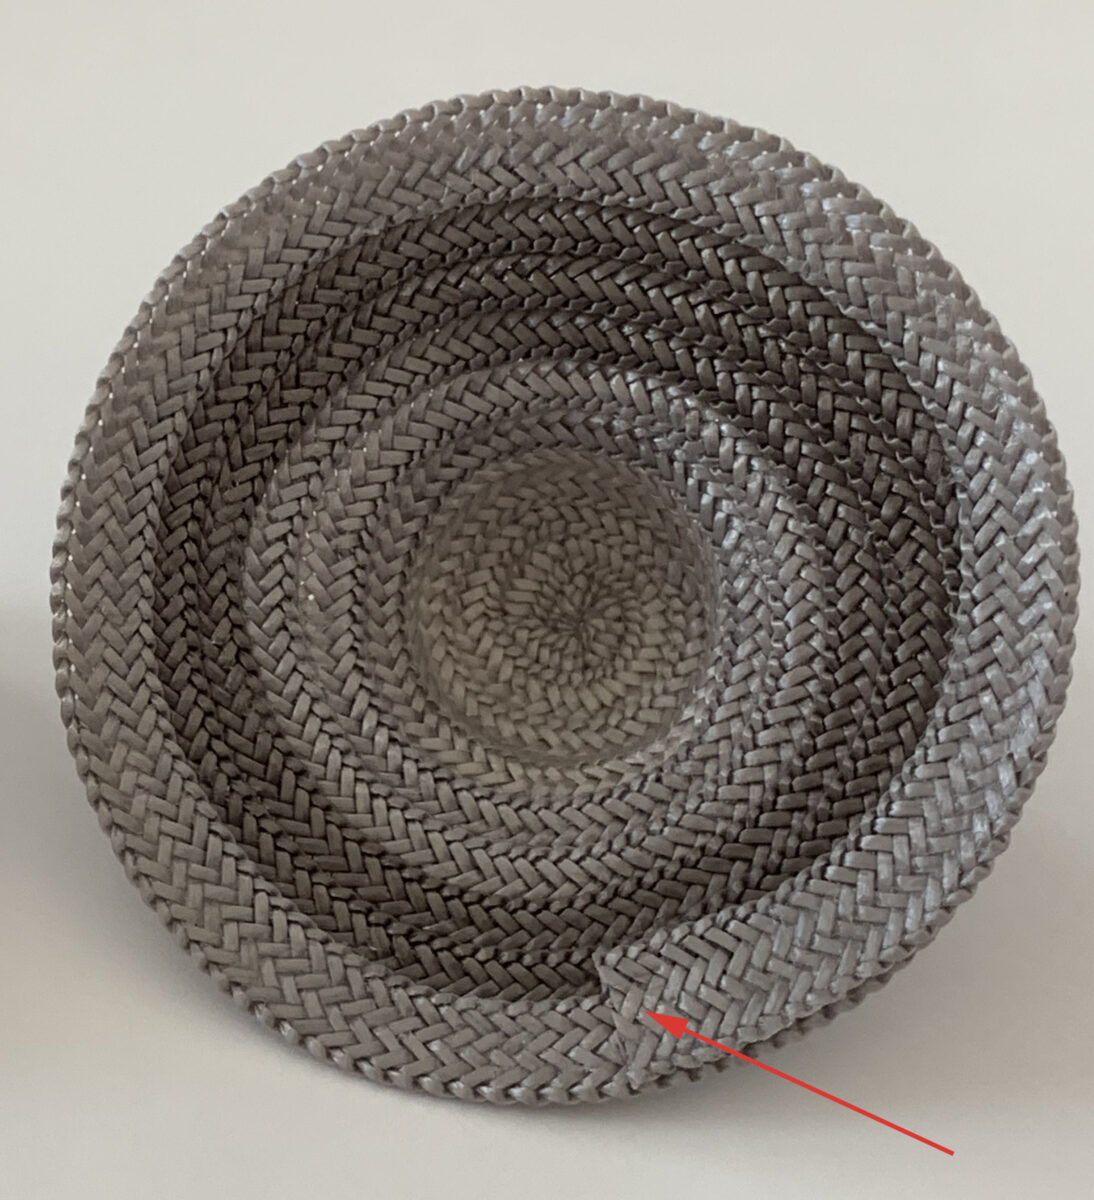
Braid tail concealed inside hat.
To protect the hat form, cover with Glad Press ‘n Seal plastic wrap (sticky side down) before each use. The hat will be easier to remove with no need for prying.
Straw braid has a thread running down each side that is helpful when stitching a hat. The threads aid in easing the braid around the hat form. When gluing, the glue adheres the threads to the form, preventing any movement.
Hemostats come in handy when “sealing” a braid end. Place glue on the area to be sealed and clamp hemostats together. Remove when glue has set up sufficiently. Hats can be made in sections and glued together. Braid ends are more difficult to conceal when gluing but embellishments can work magic.
On some miniature hat forms and designs, it will be necessary to start at the top and work down. A raw edge will be visible but can be hidden with embellishment.
Hat making forms & supplies are available online in our Etsy Store, vegasairsstudio
Grrrip Glue can be purchased from our web site.
Leave a Reply